Followers

Thursday 31 January 2019

Finished Quilt Top, Chips and Canned Spuds

Good Day!  I Say Good Day!

And what a great day it has been thus far!  I have decided to stop stressing over "Living in a Snow Globe" (The Hair. The Hair!  Whatever Shall We do About the Hair!? January 12, 2019 Post) and set about to turn the Roombas loose every morning.  I can give the stairs and areas they don't go a good vacuuming once a week.  It sure has relieved a good chunk of my daily chore time!

So now, while the Roombas are doing their jobs, Master Wilbur and I have been using this same time to go for a walk instead.  And we are certainly in much better spirits for it!  Win Win!

Papa plows around the perimeter of the property for Wilbur and I to take our winter walks.  He gets to go off leash and I get to not having to worry about biffing it on the hidden ice.  <3  <3  <3

After getting all 48 of those Scrap Busting Project quilt blocks finally finished, they sat on my cutting table and taunted me until I was able to come up with a layout plan.  I toyed with several different possibilities and decided to keep it simple - it is a scrap busting project, after all!  In the end, I decided to go with a simple white sashing, with a navy corner stone at each end. 

Back to the scrap bins. I found another navy blue, very close in value to the center blue block.  This will work.  I wouldn't need much. Just .20 m would do to cut out 63, 2" squares.  Score!

I was considering doing the sashing in various whites, when I found a larger piece of a white; 1.40 m, left over from another project.  I cut this into 110, 2" x 11" sashing pieces.  There wasn't even a thread left over when I was done cutting!  I had exactly, on the money, just enough!  Whew!  No stress there!

I then proceeded to assemble the top.  Keeping with the simplicity theme, the only outer border would be a repeat of the sashing and corner stones.  I am happy to say that I a quite pleased with the end result.  

Now it hangs in the Studio.  Taunting me to be quilted!  

Quilt top complete!  Final measurement is approx 74" x 98"

As I was assembling the quilt top, the light shone just so, onto my Emerald Anniversary Band. It was then I noticed a chip in one of the stones.  This is the same anniversary band that has had chipped emeralds previously replaced.  And reshaped, after I smashed it into an oval shape.  And had the band rebuilt after breaking it.  Sigh.  I am not meant to wear rings.  

Another chipped stone.  I am so hard on my rings.

I have a few beautiful rings that Papa has bought for me over the years that sit in my jewellery box. I don't wear them because this is what I do to them.  He says to wear them and wear them out.  I love his attitude. 

And finally the Spuds!  I purchased several Pressure Canning Cookbooks this winter for some light reading.  I love canning, preserving, baking and cooking.  This is just another skill set I want to improve upon.

I came across a method to pressure can potatoes and I thought, why not!?  Ours are keeping well in the pit, but sometimes it would be nice to have some precooked potatoes on hand to make into Potato Salad, mash up for a Shepard's Pie topping or have readily available for Potato Buns or Potato Dumplings. It would even be nice to open a jar, just to fry up for hash-browns.  So much quicker than starting from scratch.  Pint jars would net enough for any of these options.  Oh, the possibilities!

So, off Papa went to the pit to get me a bin of potatoes for this project.  He didn't have anything else planned that morning, so he offered to peel them for me.  Bonus!  He peeled and rinsed.  I diced and rinsed.  They then needed to come to a boil for 2 minutes. A final rinse, then packed into pint sized jars to be pressure canned for 35 minutes.  Two hours from start to finish.  I now have 18 pints of pressure canned spuds, ready to action at a moment's notice!  It really doesn't take much to make me happy!

18 pints of pressure canned potatoes ready to go!
I am glad that Wilbur and I got out for our walk earlier this morning as it is now raining.  Hopefully things don't get too slippery out there!

Thank you for stopping by to share my day with me.

Until next time!

Gremlynn


Wednesday 23 January 2019

48 Scrap Busting Blocks are Finally Complete!

Whew!

It has certainly been a run getting these 48 Scrap Busting Blocks put together and pressed.  I am happy to say that the block assembly portion of this project is finally complete!  I am really happy with how the blocks turned out and the fact that they all measure 11", as planned.  Hee hee!  It really doesn't take much to amuse me, does it?

All my blocks from the 4 previous steps were sorted and pressed.  As this is a Scrap Busting project, I searched thru a couple of bins, looking for a piece of fabric that was .75m of a "solid reading" color.  This was then cut into 5" strips and cut again into 5" squares.  The netted me 48 - 5" squares.  I then laid out the previous steps blocks around the center block, to keep things all sorted out for the layout of final block assembly.  I then took only the necessary pieces to the sewing machine (so I wouldn't get confused).  The strips were then sewn, daisy chain style, to the main center block - beginning with the right side of the center block, then the left side, as follows:

Step #5 a:  Sew two of the previous Step 3 units onto each side of the center 5" square.

Step #5 b:  Add the Step 4 units to the top and bottom of #5 a, paying attention to the intersecting points.

Step #5 c:  Add the two side pieces from Step One, to each side, again paying attention to intersections as required.

Final Step #5 d:  Add top and bottom units from Step Two, paying attention to intersections.

Scrap Busting Block is Complete!  You will have 48 x 11" square blocks.  Press seams to one side.  I used Best Press to get a crisp, flat finish.


I am now playing with a layout.  48 blocks will net you a 6 block across x 8 block down, quilt measuring about 60"x 80".  This adds no sashings or borders and will be the quickest way to complete this quilt top.  A perfect double bed size, with a nice drape or a large throw/picnic quilt.

I then played with adding a 2" white/neutral sashings with 2" square, scrappy corner stones.  This would add 10.5" to the width and 15" to the length, netting a 70.5" x 95" quilt top.  The only border would be the repeat of the sashing and corner stones, to make the final outside border.  This would be a great large double or queen sized quilt.

I then played with putting the blocks On Point, with no sashing but inserting triangles around the outside edge to make a straight, square outside edge.  It actually looks really great this way.  I considered, as well, the On Point placement, but cutting off the excess from the outside blocks, to square up the quilt and adding no sashing or borders.  Haven't done the math on these two.

Then, there is the option of making it either into a Huge Massive King Sized or Two Smaller Twin Sized, by adding Another, further 48, 11" blocks of a completely different fabric or block style! This in essence would be a Scrappy Block/Alternate Block combo, repeated to the desired finished size. This might be too much and I certainly don't need it this large.  Two smaller Twin sized would be a better fit for me, but I don't know if I want 2 quilts made from this block layout, but it certainly is a possibility.    

I can even see treating these Scrappy Blocks like you would a "Disappearing 9 Patch" block.  This is where you cut the block into 4 equal sized pieces, then rearrange them and sew them back together.  With the center being a nice 4.5" finished, and a "solid color", it could be quite effective.  It would be Similar to this concept to cut the block:  

Image result for disappearing patch block pictures
After cutting the blocks, Reassembly would be to rearrange the 4 new smaller blocks into a pleasing manner.  Most often, the bottom left and top right parts are switched, then the block is sewn back together.  This could be a very interesting option, for sure! 

"Something Similar" also, is this next concept where the following block - with a similar, but less scrappy layout to my block - is cut apart and rearranged.  I think this could be quite interesting, indeed! 

 Disappearing Bonnie Scotsman Quilt Block Pattern
The Options and layouts are unlimited!  I haven't decided as to what I am going to do with mine yet.  They may need to sit and marinate for a while, to let me contemplate the best use of them.

Thank you for joining me on this Scrap Busting Block journey.  It has been a great exercise to dive into and sort out some of my scraps.  Did I make even a dent in them?  Ha ha ha!  Nope.  Not even slightly!  But a quilter could have worse problems, hey!?

Until next time.

Have a wonderful day and Sew On & Sew On!

Gremlynn


Thursday 17 January 2019

Curve Balls and Frosty Beauty Abounds

Good Day.  I Say, Good Day:

You never know what your day will bring.  Even with your best laid plans, life has this way of tossing you a curve ball every now again.  Sometimes it is well received.  Other times, not so much. . . .

As I went about my morning ritual, which includes opening the chicken coop, changing the water and gathering eggs, I noticed some crazy ice cycles hanging off my rain chains.  Hmmm?  This prompted further examination.  Get your chores done first, then look, she says, as her mind begins to wander . . .

I stopped at the chicken's yard to toss in some lettuce ends and few kitchen scraps ~ seriously, they'll eat pretty much anything and think they are having a grand treat! ~ that was when I noticed the frost on the wire.  Oooooh!  Okay, stay focused.  The chickens need out, they need water, the eggs need to be gathered.  Stay focused . . . .

Opening the chicken run door, they all ran outside to see what tasty treat alighted into their run ~ I always make a big production of putting their treats in the run as I prefer to do my chores without their misguided assistance.  Shut the run door, do my job, open the door and take the eggs back to the house.  Ooooh!  There's more frost!  Ooooh! 

Eggs are safe in the house.  Grab some peanuts for the Blue Jays and my phone.  Isn't it amazing the technology available on Cell phones now?  My Galaxy 7 has a better camera on it than my old Canon Rebel XTi had!  Technology is CraZy!  Phone in hand, I went back out to take a closer look . . .

Wilbur and I spent the next 45 minutes or so wandering around the property capturing some of the most beautiful Frost pictures that I have ever had the pleasure to take!  Mother Nature at its finest.  I am thrilled to have been able to witness it.  Wilbur was just happy for an impromptu romp, with his ball, in the snow, outside!  Joy and delight for each of us, in our own way.

And, This is what I saw whilst on our impromptu adventure: 

The mesh on the coop door

The fencing of the chicken run

Blue Spruce Tip

Rail Fence

Wooden Post

Chilly Bird Feeder Perch

Rain Chain Ice

Even the rope on my clothes line pull was beautiful, but don't lick the metal post!

Too Cold to hang out the clothes today!

I don't know why the Frost intrigues me as much as it does, but I am always struck with awe by its crisp, pure beauty.  As you already know, Papa and I have no desire to spend our winter months in warmer climes.  With all this beauty abounding, why would we?!

Enjoy your day and may you find something beautiful that brings you joy as well today.

Warmest Regards,

Gremlynn

Tuesday 15 January 2019

Scrap Busting Quilt, Steps 3 & 4 (a continuation of the January 9, 2019 post)

Good Afternoon,

I have had a few uninterrupted hours out in the studio this past weekend.  It recharges and relaxes me to just "be".  The wonderful thing about sewing or quilting or pretty much any hand craft, is you have to be totally present and immersed in the project.  Because of the amount of focus you need, you really can't think about anything else.  It is wonderfully therapeutic!

I often tell my students that counselling is about $200/hr.  A good deep tissue massage is about $100/hr.  A queen sized quilt top is about $200 in materials.  Not that I a discounting a good counselling or massage session, but for day to day stress relief, quilting is a pretty great bang for your buck!  On going, daily therapy, if you will!

This Scrap Busting  project that I am currently working on has given me some peace and a quietness to soothe my busy mind.  It is a time to just be totally present.  I am certainly enjoying the process. 

*****The first two steps for this project can be found in the January 9, 2019 post.***** 

All seam allowances throughout the piecing process for this project are a scant 1/4"

For Step 3, you will need 96 white/neutral 2" square units and 192 print/color 2" square units.  Sew a print square onto both sides of the white square, to make 96, 3 piece units.  Press towards the color/print squares.

Step 3:  96, 3 piece units using 2 print and 1 white, 2" square pieces, pressed to the print squares

For step 4, I sorted out into 5 piles, 96 units each, the remaining white/neutrals and prints, 2" squares.  There will be 3 piles of white and 2 piles of print squares, alternating white/print/white/print/white.  

Step 4:  5 sorted piles of whites and prints, alternating w/p/w/p/w, with 96 units in each pile

Sew these together to make 96 strips, each measuring 8" long, when complete and pressed.  I sewed mine together in pairs of one white and one print.  I then joined the pairs together.  And finally the final white square onto the opposite end,  to make 96, 5 piece strips, starting and ending with a white/neutral 2" square. 

Step 4:  96, five piece strips, measuring 8" long, pressed towards the print pieces

I am now ready to audition fabrics for the centers of each of the big, finished 11" square blocks.  These units from Steps 1-4 will become a part of those blocks.  I am looking for a single fabric that will pull this all together and give this scrappy collection of pieces a bit of continuity. 

Following Steps 1-4 will net you the 4 different strip sets that you will be using to make the final 11" square block.

The four different strip sets from steps 1-4 are complete and pressed

I will be back with the final step for this block once I have found the center fabric that I am happy with.  I will then show the assembly process for the whole 11" finished block.  

We will then explore a layout for this quilt top at that time.  Stay tuned!

It is a warm, but overcast day today.  Papa tells me that today will be the last warm day for a while, so I had better take advantage of a nice walk today.  And with that, I am going to take the beast out for a run.

Until next time,

Gremlynn


Saturday 12 January 2019

The Hair. The Hair! Whatever Shall We do About the Hair?!

Good Afternoon:

Up until now, I have been using the daily calendar dates as my Post Titles.  I have since realized that when I have to go back to look for something previously posted, I have no indication of what was written, unless I actually re-read the post.  Hmmm.  This required a re-think that perhaps actual Post Titles will help me (and you readers) when I need to go back to find a specific topic.  So, henceforth, I shall be using Post Titles. 

I have had a couple of busy days in the past few days.  Usually I get a lot of studio time during the winter months, but it seems when I really want to get a project, other things pull me away. 

One of these "other things" that has been distracting me lately is the dust and dog hair that pops up, settles in, and floats down.  Literally, over night in my house.  When you share a house with a very large -130 pound - Bernese/Pyrenees dog, you discover a new meaning to the word - Shed.  We knew when we adopted our adorable pup that he would shed.  But somehow I misunderstood the actual shedding concept and thought perhaps an occasional bit of hair here or there.  I may have to sweep a little more often.  Perhaps vacuum twice a week.  Yup.  I was totally clueless.  It is like living in a freaking Snow Globe!  I Swear It!  A Freaking Snow Globe!

His Majesty having a nap after a hard day of being himself.  :)

The good news is he is not bothered about the vacuum.  Thank Goodness!  In fact, he loves to "help" me with my now daily chore.  This usually involves following me around with his green, squeaky ball and squeaking it very near me and very loudly.  This is either at my hip or against my backside.  And I do mean squeak it.  Full On.  Squeak.  Squeak.  Squeak.  This activity can last 10 or more minutes during the daily vacuum session - which, by the way is about an hour in length, on average.  

His other favorite activity during the vacuum ritual is to sit on, or get wrapped up in the hose.  

Can't begin to imagine why my hose loses suction or won't move!


I have a central vacuum system with a 30' long hose, so it can get out of my line of sight.  When my suction suddenly decreases or I can't get any more necessary length, I yell, "Get Off my Hose!", and Voila! my suction magically returns or I have a few more feet in length!  

The first few times I caught him doing this made me laugh out loud.  He would bring his pillow bed, put in on top of the hose and lay on it.  Or just lay on it.  Or wrap himself up in it.  Regardless of how, it was no wonder that I lose suction or can't pull the hose any further.  

If he isn't doing either of those helpful activities, he has been known to "mouth" the hose, just a bit, to hold it, so he is "helping" me.  Thank goodness there is a protective sock on it!  

I do have to admit, vacuuming has never been more entertaining - and I have never vacuumed more in my entire life.  I think I have vacuumed more in the past 2 years than I have in total in the previous 40.  

Never a dull moment with this character!  He does make me smile.  Every Day.  

What drives me even more batty, is to be wrapping the hose after a session and to see several new hairs on the floor.  I swear.  He sheds by the second! 


And the Dust!  I don't know where it is all coming from!  We have those Super Duper Dust Collecting Filters in the furnace, and I don't think I have ever dusted more in my life, either!  

I don't know if Papa and I are returning to the dust - you know:  Ashes to Ashes, Dust to Dust - or if the dog has anything to do with it, but man, oh man!  I have never seen so much dust in my life!  

It could be the country living with the combine dust, and dirt roads and field dust that gets into the house during the warm months, when the windows are open?  Perhaps, it just hides out until the furnace kicks in.  But Holy Hannah!  The Dust!  

So, I have decided, that I obviously can't keep up with it or ever get ahead of it.  And you wouldn't know that I just did either chore anyways.  I have resigned to the fact that my house is going to be like living in snow globe.  

I either can fret about it and clean, wipe, vacuum, and dust daily, if not hourly.  Or just be like Elsa, and Let It Go, Let It Go, Let It Go.  I am just going to go with it and get over it.  Just do it when I absolutely can't stand it any more.

I have better things to do and projects that I enjoy far more.  They say a little dust never hurt anyone.  I guess I am going to have to test the theory.

Until next time,

Gremlynn

Wednesday 9 January 2019

January 9, 2019

Good Afternoon:

In this life you can choose to be content or you can choose to be constantly searching. It really is all about lifestyle.  It's about a quality of life.  If you love your life and have created a life that you want to live, you are rich beyond words.  When you live the life you want, and do the things you love, you never need to take a vacation from it.

When Papa and I chose this self-sustaining path, we did it for a couple of reasons.  The first and primary focus was to have control over what we are feeding ourselves and our family.  The secondary focus was to have enough to do to keep ourselves well entertained into our very golden years.  Especially during our long, cold winter months, here in Sunny Alberta.

Although we both do like to travel, we knew that this would only fill a very small part of our calendar year.  And since neither of us loves the Hot Weather like so many others do, heading to Arizona for several months during our winter months, doesn't really appeal to us either.

We are both 4 season loving home bodies.  We spend all our time outdoors in the spring/summer/fall lovingly tending to the yard and gardens.  I love to can our produce and it thrills me beyond words to use our own product, grown on our land, for our consumption.  But I do have to admit that we both do Love Winter, and not for the outdoor sports aspect of it. . . . we both have hobbies that fill our time at home during the cold, winter months.  This is where our 2nd lives come into play.  Papa loves to play in his workshop and I have my Glorious Studio!

My Prairie Points Quilters Studio includes items for retail sale, a classroom space where I teach and my personal work space.  When I am not in the yard or garden or putting up produce or otherwise in the kitchen, my every other waking moment is spent out here.

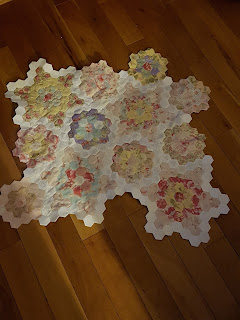
I have had a love affair with a needle and thread for well over 50 years now, and it is a passion that absolutely continues to consume me.  I am one of those who needs to be constantly busy.  I can't sit and watch a movie unless I am knitting something, working on EPP blocks, quilting a quilt, anything.  I simply cannot just sit.  I spent the better part of the fall, into the Christmas season knitting.  Now I am working on my English Paper Piecing again in the evening.  It is amazing how quickly it goes!

EPP Work in Progress, completely hand done

I have a completely different project that I am working on in the Studio.  Actually, it is one of several, but this one is my main focus at the moment. 


Whites and Neutrals cut up into 576, 2" squares and 192, 2" x 5" rectangles

Assorted colored scraps cut into 768, 2" squares

Steps one and two complete

I started by sorting out and cutting 576, 2" squares from white and neutral fabrics as well as 192, 2"x 5" rectangles from the same whites/neutrals.

From the printed fabrics, I sorted and cut 768, 2" squares.

Step 1.  Sew one colored, 2" square onto each of the 192 white/neutral rectangles.  Press to the print side of the block.

Step 2.  Take 1/2 of the blocks made in step one, 96 units, and sew a white/neutral 2" square onto either end.  Press to the dark block.

As I proceed with my project, I will take notes and continue to post in this blog as well as on my Prairie Points Facebook page:  www.facebook.com/PPQSPONOKA

Until next time, chose contentment.  It really is a great place to be!

Warmest regards,

Gremlynn


Monday 7 January 2019

January 7, 2019

Happy Monday!

After 2 days of feeling downright miserable, I am happy to be up and at 'em again.  Being sick and I, don't do well.  Nothing hurts me more than not being able to get things done.  Some people relish in an unplanned day off.  Me, not so much.  I always seem to have more to do, than I have hours in the day!  But I did take the necessary time to recoup, regroup and recover.  Still not feeling 100%, but definitely much better now.

And, since I wasn't feeling very well yesterday, I spent some time on one of my favorite Facebook pages, Alberta Gardening:  https://www.facebook.com/groups/472577249593637/?ref=nf_target&fref=nf  .  I shared the first two pictures of the cabbage and carrots to then receive so many questions as to how we manage to keep them so well, and into January?

Cabbage and carrots from our garden harvested in fall of 2018.

I am so impressed at how well our veggies keep in the Pit.

A stew made from our beef, veggies and herbs ~ ready for the oven.


Several years ago, Papa and I built a storage pit in our unheated machine shed.  It is 8' deep and 3' across, cribbed with 2x4's, 2x6's, and 2x8's ~ whatever scrap he had kicking around.  He dug the hole, I passed down the wood, he filled a bucket with sand, I hauled it up and dumped it.  It took a few days to get it all done, but a mighty fine hole we had.  I still chuckle when I remember him asking for a ladder to get out, when he finally got it as deep as he wanted.  That's quite a fine predicament you have gotten yourself into, isn't it, says I?  Ha, ha, ha!  Apparently, he didn't think it was quite as humorous as I did!  No sense of humor at all!  Hee hee hee!  

After I let him out, he then proceeded to insulate the walls with left over Styrofoam pieces and built a lid from 3/4" plywood and 2x4's.  He built a second "lid", a plug, if you will, with 8" of Styrofoam to fit under the lid as an extra insulating precaution.  We do get to -40 degrees Celsius here.    

The first year, it worked too well and we ended up with way too much humidity in the pit.  He then drilled a couple of holes and installed some pvc pipe to vent it. That worked perfectly!  Now the humidity runs about 85%, which is perfect for potatoes, carrots, beets, rutabagas and cabbage.  The screened vents are either open or covered, depending upon the outside temperature.  There is no source of heat required, as it is below the frost line.  We can keep these veggies until April/May and they still are fresh and crisp.

So, how did this plan come about?  When we built the house, we had in our plan, a Cold Cellar in the basement.  There is no in-floor heating in this room and with the outside vents, we thought we would have the perfect cold storage room.  

Apparently, our plumber didn't completely understand the whole Cold Storage concept, when he ran the heating pipes from the boiler through this room, out to the in-floor heating in the attached garage.  Sigh.  So Papa insulted and sheeted in the roof of the cold storage room, to contain the heat from the pipes traversing through.  It was simply not enough. 

Although the room is still quite a bit cooler than room temperature, it will never be cold enough to be used as intended.  It is cool enough for preserves, wine and other veggies like pumpkin, squash, onions, garlic, but it is simply too warm for anything else.  Time for a Plan B. 

Necessity became the mother in invention.  I figured if they can store root vegetables in Alaska, Iceland, Siberia, Finland, we should have no issues doing it here.  Some serious research and a bit of ingenuity, a bit of trial and error and we have a solution to our problem:  An in-ground, below the frost line, Cold Storage Pit.  Ta da!

In hindsight, it was a mixed blessing that the plumber didn't comprehend the whole Cold Room Concept. We now have a nice warm floor above this cool, storage room, with adequate coldness for everything kept in it.  

We also realize that we would have required a different storage system/room eventually anyways, since we wouldn't have been able to store everything we need to keep.  All's well that ends well!

Warmest regards,

Gremlynn

Friday 4 January 2019

January 4, 2019

Good Afternoon:

It has been a fun filled couple of days for Papa and me, when our middle Grand Buddy, stayed over recently.  We love it when a Little wants to hang out with us Grands.  Always so much fun!  And they are always so polite.  When I ask what they want to eat, it's always:  Whatever you want.  That's not what I asked. What do You want to eat?  This time I got a ~ Pancakes!  And, as always, the Little gets to help prep the meal.  After he chose one of the eggs he had previously gathered that morning, we set about to make pancakes. 

Beat egg until frothy.

Cast Iron Griddle.

The end result, complete with Maple Syrup and Whipped Cream!  Yum!

He thought the old fashioned egg beater was pretty cool!  He got that egg good and frothy, just like the 1950's recipe said to do!  This recipe was from the Blue Ribbon Cookbook.  A simple, no fail recipe.  

In bowl:  Sift together 1 cup all purpose flour, 1 Tbsp Baking Powder, 1/2 tsp salt & 2 tbsp sugar.

In separate bowl, beat one egg until frothy.  Add 1 cup of milk and 2 tbsp melted butter.

Pour egg/milk mixture into flour mixture.  Stir until combined.  Batter will be lumpy.  Onto greased skillet or griddle, scoop 1/4 cup mixture per pancake and flatten, if necessary.  Flip when bubbles form and bottom is brown.  Let cook until cooked through.  Makes about 8 pancakes.
 
The older I get, the more frustrated I have become with electronics.  In fact, if an electric/electronic appliance wears out at our house, I have to think long and hard at to what I am going to replace it with.  A few years ago, yet another coffee pot gave up the ghost.  We decided not to replace it.  We now have 2 coffee presses and 2 Corningware stove top perks ~ neither of these have any parts that could wear out or malfunction.  The old fashioned egg beater will replace my hand mixer, when it goes ~ but I have it on hand already, to prepare for that day.  

It amazes me how appliances made in the 1950's, 60's, 70's and even early 1980's still work very well, as intended, without a hiccup.  Anything electronic/ electric made in the 1990's and newer seems to have a built in malfunction/expiration button.  I for one, don't want to play any more.  A coffee maker should last for more than 2 years!  Electronics have become absolutely disposable and it actually makes me sick.  What a crazy, consumer driven, disposable society we live in!  

When we built our home in 2009, we went mid-high end appliances, thinking this should be it.  We should have these for the rest of our lives.  Ha!  The dual-fuel Electrolux Stove needed 3 motherboards replaced in 4 years.  Our Dual Drawer Fisher-Paykel Dishwasher had gone thru 2 top mother boards and 1 bottom one, and needed yet another replaced.  The Electrolux Microwave also powered out within 5 years.  This is ridiculous!  

Since we obviously can't do without a stove, I had our local appliance store (privately owned, not a franchise) search for a 100% gas range with NO electronics.  The ONLY one on the market available that they were able to find, is a Blomberg, made in Turkey!  It does have electric, but not electronic igniters, so I can still use the range top in a power outage or complete failure of them.  There is nothing that can go wrong with this stove.  It is a modern "old fashioned" gas stove.  

The Dishwasher is a standard dishwasher - but if it goes, it won't be replaced - as well as the microwave ~ or death box, as I have heard it called recently!  I hardly ever use it, so I certainly won't miss it.  In fact we went for probably a year before we replaced the other one.  I didn't miss it at all, but Papa did, so I caved and agreed to replace it.  He knows that if this one goes, that's it for microwaves.  

Our washing machine is an old fashioned Whirlpool, complete with agitator and crank dials.  That was difficult to find as well, but I love it.  And the dryer isn't used very often, so if it goes, it will be a slight adjustment, but not life altering.  

Even my computer is a Windows 7.  I haven't upgraded since I don't download anything and I really love the programs I have installed.  

My Cell phone went from a Samsung slide phone to a Galaxy 7, when I needed a way to accept electronic payment.  Now that I know about e-transfers, I will have to think long and hard about replacing that, too, should I need to.

Once Papa left the corporate world and left his electronic leash behind, and went without a cell phone for years afterwards.  It took him even more years to even agree to get an e-mail address again!  He has my old Samsung Slide phone now, and everyone knows that when it no longer works, he won't replace it.  He would rather spend his time in the garden or greenhouse.  He figures if anyone really needs him, they can call him on the land line, which we still have one.  But the cordless phones all need to be replaced now.  And you know what?  It ain't gonna happen!  

Yup.  We are almost Luddites!  Not quite, but almost!   

Enjoy your evening!

Warmest Regards,

Gremlynn


Wednesday 2 January 2019

January 2, 2019

Happy New Year!  Welcome 2019!

We've had a busy few days here.  Our Little's and their Parental Supervisory Units came for a Sleep Over on New Year's Eve.  We have offered over the years to have our Little's come to stay over, so the Big's could attend any Adult themed celebrations, as desired.  This year, one of the Big's had to work ~ Service Industry, attending to other unsupervised Adults who were Celebrating.  The other 2 decided they wanted to participate in the Kid Friendly Option we offer here.  

They arrived in good time.  We had steaks out for a non-Chinese Food option, to grill for themselves.  Miss K and I headed to town to pick up dinner for the rest of us.  We decided to try a Chinese restaurant we hadn't tried before.  It came with rave reviews so we expected a fantastic meal.  We arrived, ordered Jasmine tea, chose our food and waited for it to be prepared, so we could take it away.  We found it was rather pricey, but with the new minimum wages increase, carbon tax, etc., we chalked it up to the cost of doing business.  Our order was ready to go in about 20 minutes, so we picked it up and headed for home.  The steaks were ready for those having steak.  Perfect timing!  Our order was laid out and people served up.  Hmmm?  No fortune cookies and minimal dipping sauces?  That was rather unexpected and somewhat odd.  The Chow Mien, Fried Rice and Chicken Balls were very good.  Everything else was Mediocre, at best.  So terribly disappointing.  I don't know if those who gave it the 5* rating were related to the owners or never had Good Chinese before or were drunk and didn't know any better, but it certainly wasn't anything like any we would call "good" - and we have been to some GREAT Chinese Restaurants - in Chinatown in Calgary & Edmonton. The Red Star in Red Deer does Amazing Dim Sum, Western Style Chinese and Authentic Chinese style food.  I guess we'll just call it an experience and won't order from there again.  It didn't even reheat well.  Tossed the lot.  Good thing we got that over in 2018, so we have nothing be high expectations for 2019!  

The remainder of the evening was wonderful.  The Little's designed a Trip Wire system in their area of the house that would have given Mission Impossible a run for their money!  We played Mexican Train Dominoes.  Have lots of laughs, a few bevies and watched the count down to ring in the New Year.  Even Wilbur had a great time with all his favorite Little People at his house!  The littlest Little had powered out before the big count down and missed it this year.  Hopefully she can stay the course and join in the revelry next year.

MI Trip Wire system to warn the Little's of Big's and Grand's intrusion.


New Year's Day brought a Big Breakfast for all.  Papa and the Biggest Big, took down the Ladder related Christmas decorations, before the Parental Supervisory Units took the Littlest Little home.  The older Little's got to hang out with the Grands.  We settled into the Game of Life after we shooed the rest out the door.  A Roast Beast went into the oven and we had a delightful day of games, a nap and the general Tom Foolery that Little's and Grands tend to get into when the Big's are away!  

Nothing like a good, old fashioned Game of Life
It is a rule in our house that you cannot make a Roast Beef Dinner without Gravy and Yorkshire Puddings.  Seriously.  We even had this meal for our wedding supper at Papa's insistence.  I had NO IDEA that this is such a Huge deal.  It truly is!  I have since mastered the Yorkshire Puddings over the years after trying several recipes, oven temps, different pans, different oils/fats, different ratios of eggs/milk/flour.  I have finally tweaked it so we get great results every time.  I do believe that you have to find what works best for you and your own variables.  Others do it very differently from me and have amazing results.  

Yorkshire Puddings almost done.  About 5 more minutes to bake.


Here is my personal recipe for Yorkshire Pudding

Pre-heat oven to 400+ degrees F.  My oven is gas, so it is difficult to get an exact temp, thus the "+"

In Un-greased muffin cups add 1/2 tsp frozen beef tallow into each ~ yes, you read that correctly.  We render our beef fat after we harvest our beef and freeze it.  If you don't raise beef, perhaps you could get some fat from the butcher and render your own.  This goes into the oven, to get smoking hot.

Meanwhile, in a blender:  blend, mix, then turbo:

4 room temp eggs
2/3 cup all purpose flour
2/3 cup whole milk
pinch of salt

When muffin cups are smoking after 5 or more minutes, remove pan and quickly pour mixture into cups, evenly divided between them all.

Bake 25 minutes until well puffed, golden and dry/crisp

If they are Underdone, they will:

Stick to the muffin cups
Fall when taken out of the oven and/or cups
Be chewy or doughy

Those issues mentioned above require you to either bake longer or adjust oven temp.  If you can't get tallow/fat, try using Lard, Real Lard ~ Not Crisco, not oil.  You will get a similar and quite acceptable result.  

Happy New Year to All!

Warmest Regards,

Gremlynn