My Turkey Stock pressure canned yesterday afternoon turned out beautifully! Look at the gorgeous, rich colour!
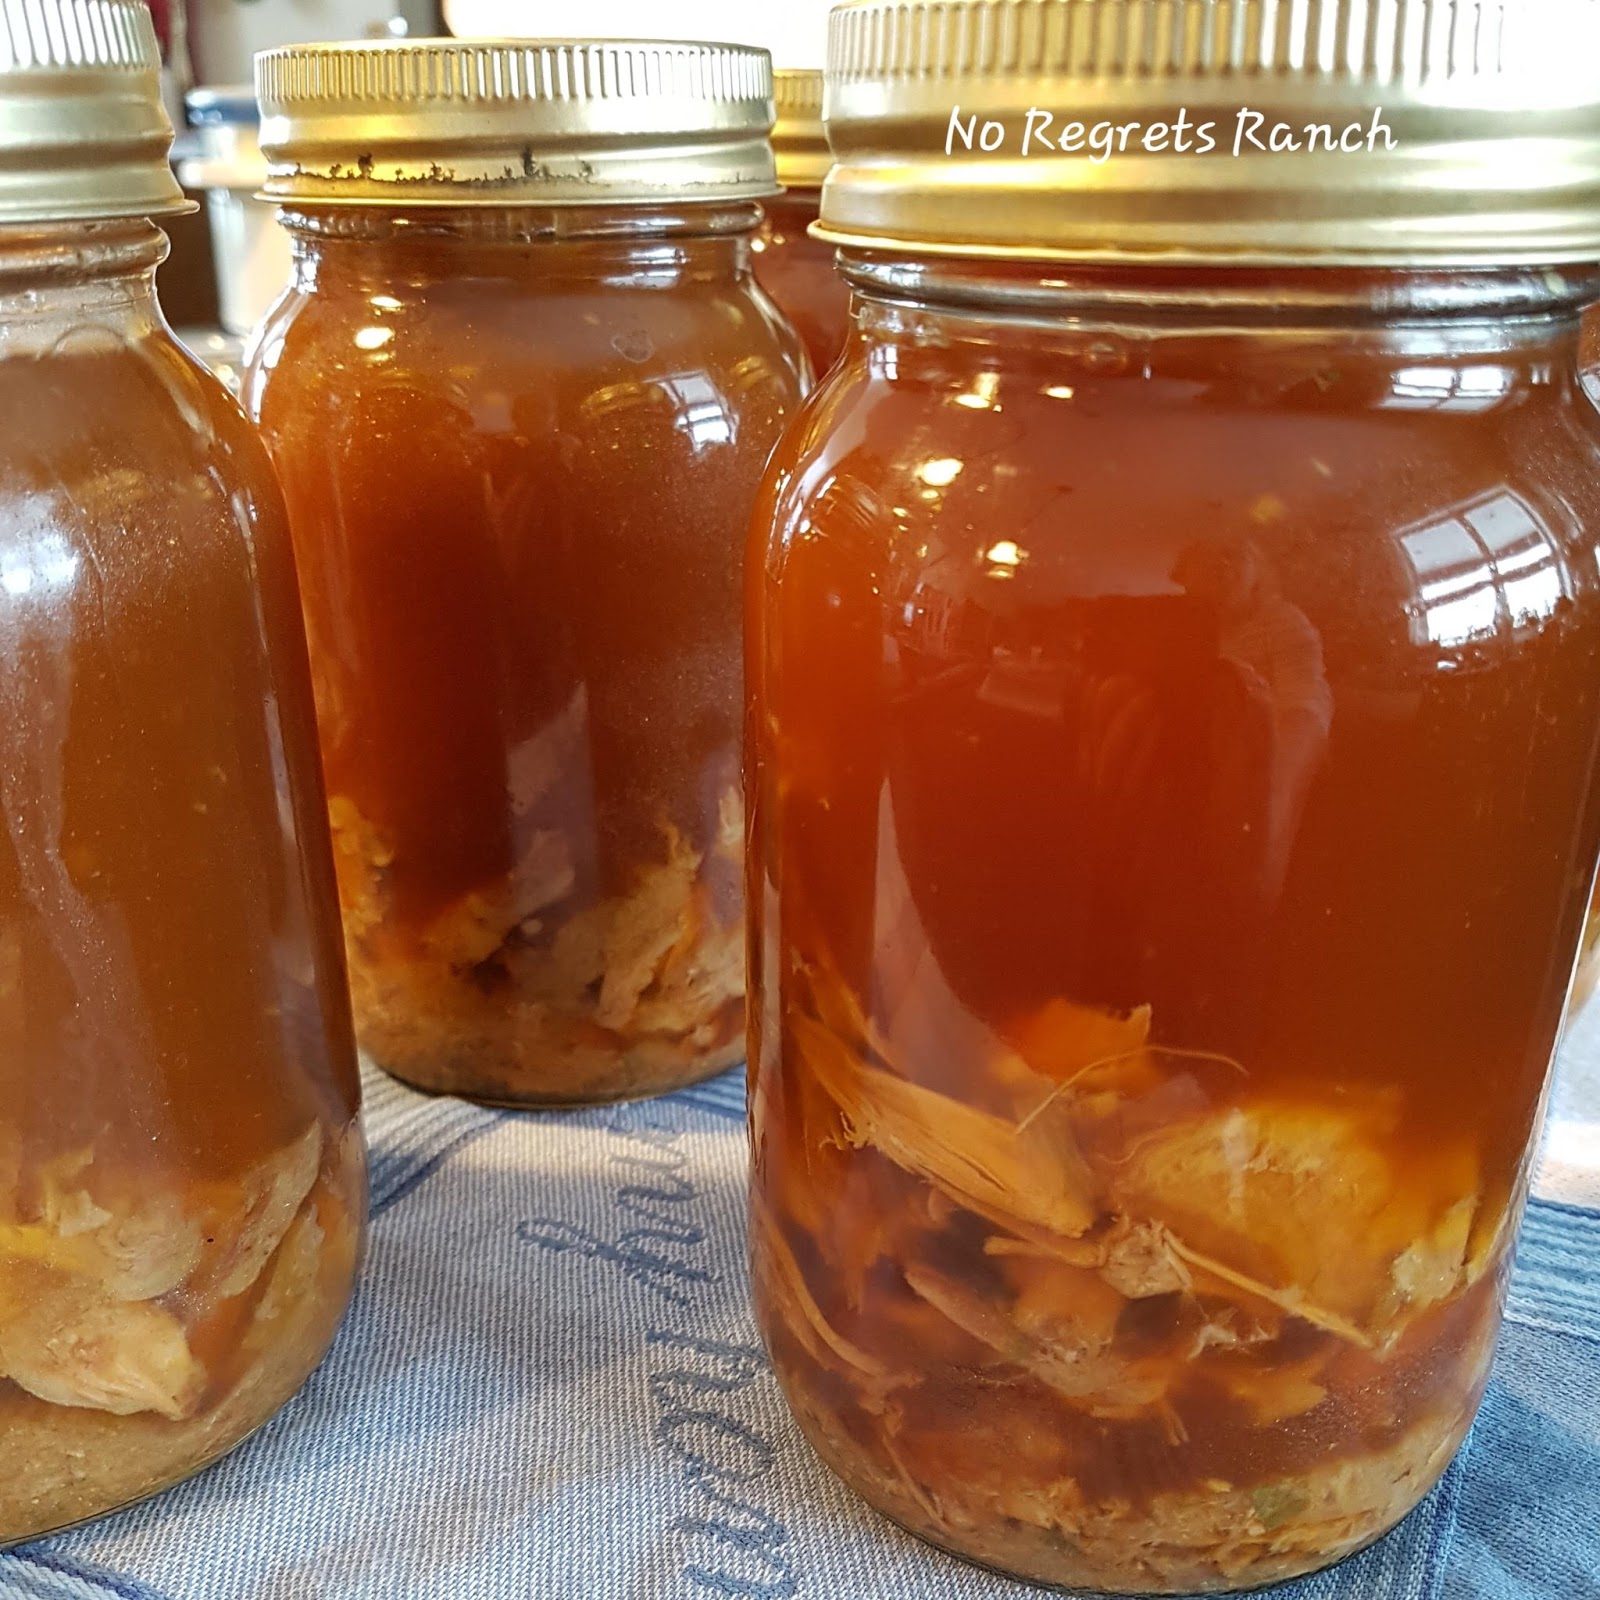 |
| Pressure Canned Turkey Stock |
One of the things that Papa & I love so much about homesteading is producing our own food. We grow our own beef, chickens [for meat as well as eggs] have 2 large gardens, a greenhouse and 2 orchards ~ one being the trees along our driveway. We have always dreamed of living a self-sustaining lifestyle and are pleased with our efforts so far. I still purchase baking items like flour, sugar, yeast, etc as well as our dairy. We have talked about getting a cow, but we just wouldn't be able to consume the milk produced or the products made from the milk. We have considered getting a nanny goat as this would be a more reasonable amount for us, but we still couldn't make butter or hard cheese from the goat's milk. I would, however, love to be able to purchase raw milk to make my own butter, cream, soft cheeses and yogourt from, but this is not something that is available to us in Alberta. If I want it fresh and raw, we are going to have to produce our own. Perhaps this may become an opportunity in the future at some point. Papa has a source for wheat that I mill into my own whole wheat flour to bake with. It makes the lightest, most divine Honey Whole Wheat Bread.
 |
| Our Farm grown chicken, veggies and herbs. Yum. |
 |
| Wheat before and after milling into flour. |
 |
| Farm Fresh Eggs and Preserves |
To us, it is quite enjoyable and very satisfying knowing that 85% of what we consume comes from our land and our hands. Very fulfilling, indeed. We know it is not for everyone, but we prefer puttering away at home over pretty much everything else. It is very long and hard work for 3-4 months, but for the rest of the year, meals are pretty simple. I either grab something from the freezer, the root cellar or a jar of something from the cold cellar. We don't have much in the way of fresh veggies in the winter, but to be very honest, we don't actually like what is available for purchase. After eating a just picked tomato or cucumber or peas, pulling a fresh carrot or digging up a beet or potato, really ruins you for "fresh" veggies when you have to purchase them. I can hardly stand the taste and texture of lettuce from the grocery store, tomatoes have no taste and half the time the cucumbers and peppers are already old tasting by the time I bring them home. So, we have decided that we won't waste our time and effort to get "fresh" produce when my canned and frozen is superior. We eat so much fresh produce from April to November that we are okay with waiting until the spring so we can have our own again. This also goes for meat. We so prefer our own product, that we will do without before we purchase something over the counter. I guess we have become very accustom to how things are "supposed to taste" that we can't be bothered with commercially grown or prepared food! Who would have ever guessed that we would become Foodies!?! But we don't mind the work and are willing to wait for the results.
In the winter, I get to spend quite a bit of time out in my studio, reading, looking at patterns, designing, creating, quilting. I love to come out here to watch YouTube videos, listen to CBC Tempo and work on my writing. I find it a lovely change of pace. In the evening, if we are in the house, I am often knitting or hand quilting something. Last winter I hand quilted a King Sized Double Wool Batted quilt for our bed. It was warm and cozy to work under. This year I am knitting lots and lots of wool socks! It takes a few evenings to make a pair, but it is a relaxing pastime. And I really love the results. They are soft and cozy and wear and last so well.
 |
| Hand knit cozy wool socks |
 |
| 105" x 105" hand quilted with a double wool batting |
Enjoy your day! Thanks for stopping by.
Warmest Regards,
Gremlynn
OOOO. The quilt looks FABULOUS Lynn. It is one of the ones I have kept out hoping to get done while I wait for the new house but still have not gotten around to it.
ReplyDeleteThank you Kathy. It sat in my "to do" pile of tops for a few years, before I decided it was time to actually finish it. I am happy with the end results. I even made a couple of pillow cases to match. Happy New Year!
DeleteOur household has just purchased a grain mill and several bags of wheat. I'm still struggling in getting a decent loaf. Would you share your recipe for your honey whole wheat bread? And which wheat you used. Thank you, really enjoying your blog!
ReplyDeleteGood Afternoon, Amy That's Me.
ReplyDeleteI just asked Papa what his farmer buddy grows for wheat, but he couldn't tell me. He did say that it is not sprayed with anything, untreated (he gathers his own seed from year to year), no herbicides, no pesticides, no fungicides. We actually have to clean out any bits of chaff and other findings before I mill it.
Off the top of my head, I set my Kitchen Aide mill attachment to as Fine as it will go. It takes 3 cups of the whole grain to yield 4 cups of finished flour.
My Honey Whole Wheat Bread recipe is an adaptation of the Betty Crocker's Breads recipe book, circa 1974 (1977 printing) by Golden Publishing. ISBN: 0-307-09919-9. This book was still available on Amazon a few years ago, so you might want to look it up for your own library. It's a great book with recipes from before our wheat was altered so I always get great results when using my own milled flour.
My version of the recipe is as follows:
2 pks active dry yeast dissolved in 1/2 cup of warm water in a large mixing bowl.
When yeast is bubbly (about 10 minutes) add 1/3 cup honey (I use unpasteurized locally sourced), 1/4 cup melted butter, 1 tbsp lemon juice (makes a nicer loaf for some reason and was suggested by a friend so I always add it now) and another 1 3/4 cups warm water.
Beat in 3 cups of your whole wheat flour and 1 tbsp salt until smooth.
Stir in 3-4 cups of unbleached flour, just enough to make the dough easy to handle.
Knead on a lightly floured surface (add more flour if you are sticky) and keep kneading about 10 minutes until your bread is smooth and elastic. It will actually feel satiny and cool when it is ready.
I smear more butter onto the dough, all the way around and place in a greased bowl. Cover with a cloth (or put into the oven with the light on, which gives just enough heat to help it rise) for about 1 hour. Dough is ready when if you poke it, the indentation stays.
Punch it down and divide in two. Shape into 2 loaves and place in greased bread pans. The larger the pan, the less it will rise out of it. Narrow pans make tall loaves. Let this rise another hour in the oven with the light on or under a tea towel, in a draft free place.
Remove your loaves from the oven, if that's where you are rising them and preheat your oven to 375f (mine is gas, so I go to about 400f).
When oven is up to temperature, bake for 40-45 minutes. To check if they are done, tap with a wooden spoon and they should sound hollow. If they sound dense, they are not done.
Remove from oven, then from pans (I flip my pans over and put the fresh bread on top of the pans to cool). Brush with more butter. Enjoy!
This bread freezes beautifully!
And thank you for your kind words.
Warmest regards,
Gremlynn
Thank you so much! I will try this recipe tomorrow morning!
Delete