Followers

Tuesday, 12 May 2020

I Love Old Things


Greetings Fellow Earthings:

I love Old things - which according to Papa, is a good thing, since he too, is an Old Thing!

I love old classical music.  I love old rock and roll. I love antiques.  Old Mason Jars.  Old jewellery.  Old furniture.  Old friends.  Old dogs.  Old cars.  Old china and glassware.  Pretty much anything with a history to it.  People get really excited over new things.  Not me.  Give me an estate sale, a garage sale, or an antique shop, any day of the week and I'm a happy girl.

Part of my vintage canning glassware collection.
I love old recipes and old recipe books.  I have a collection of old recipe books that I often peruse, just for fun and inspiration.  My favorite bread recipes come from an old Betty Crocker Breads recipe book.  If  I get a notion to make a "new to me" bread, I check this book out first.  Chances are very good that there will be a recipe for it and I will have great success.

My "Go To" Bread Recipe book.  You could still get this on Amazon, when I last checked.
It definitely covers all your bases.  My copy was purchased new back in 1980. 
It has been well loved!

I love the terminology used in these old books.  I love it more when I find a "replacement" recipe book for a well loved book from my collection. 

The Blue Ribbon cook book was picked up at an antique shop. 
Hubby has his mother's original one from pre circa 1961, well used and loved. 
I was thrilled to find this pristine copy, to tuck away for him. 
The Bread Book was picked up as some of the recipes really intrigued me. 
There are also hand written notes in the margins by a previous owner.  This is gold to me! 
The old Co-op bottle/can opener is the tool I use to open my home canned preserves.

My Go To Dumping Recipe from the Old Blue Ribbon Recipe Book.
I make these every time I make a stew.

Even as a child, I would spend hours going thru my Granny Graham's recipe books, her notes and her hand written recipes.  I know that I inherited my love of cooking, baking and preserving from her.  I always enjoyed just sitting on the little step stool at the kitchen counter peninsula and watch her go about her daily kitchen routines.  She made it all look so easy.  Her meals were simple, from simple ingredients, but always wonderful.  I especially loved her flour bin.  It was built right into her kitchen cupboard and held a whole sack of flour!  Talk about convenient!

My Granny Graham's Dumpling Recipe which I typed out around 1978
When we go antiquing, I am always drawn to the kitchen items and recipe books.  You never know what treasure you might stumble onto.  Papa scouts for vintage Lionel "O" Scale Trains and antique hand wood working tools.  We each have our favorite things to hunt for.


I found this old cloth bound Purity Flour Cook Book at an estate sale. 

For being printed in 1937, it is in amazing condition!

It is wonderful when you find treasures from days gone by in old recipe books.  The recipes are more of a reminder to the cook, rather than an actual recipe.  This baker made this recipe so often that all she/he needed was a few notes.

Besides old recipe books, I also have a collection of vintage cook ware, mixing bowls, casseroles, utensils and other every day items.  That I use.  Literally every day!

This Women of Unifarm Recipe Book was given to me back in 1982 as a shower gift.
Some of the recipes are so vintage that they no longer readily available ingredients.
For instance, there is a whole section on Rape Seed oil recipes! 
The egg beater is from the early 1900's and was a gift from a dear friend. 
And yes, it works!  My grand kids love to use it.   
You won't find a Kurig in my kitchen.  Coffee is made either in one of my two Pyrex stove top percolators or a press.  After replacing several electric coffee makers over the years, I had finally had enough.  It didn't matter if it was a $20 discount store special or a $200 programmable system, I only seemed to ever get 2 or maybe 3 years out of it, before I had to set out to find yet another one.  My last one expired about 15 years ago.  I was fed up and unwilling to spend another dime on yet another disposable coffee maker.  This led me on a search for vintage Pyrex Perks.  I have been blessed to have found not one, but two fully complete with basket and stem, in two different sizes.  Wow!  This is a game changer!  Coffee has never tasted so good!


My 2 vintage Pyrex Coffee Perks
Like coffee makers, I have purchased several non-stick frying pans over the years.  Even buying brand name pans, have resulted in the finish eventually flaking off, rendering them unsafe to use.  I was always told how difficult cast iron pans were to maintain, so my set of three vintage cast iron ones sat, unused and unloved, for literally decades. 

It became time to replace yet another set of Teflon pans.  It dawned on me that I had these old cast iron ones tucked away.  Why not get them out, clean, re season and try to use them?  Wow!  Not only are they convenient to use since they can go from the stove top to the oven and back again, but once seasoned, they are as non stick as any Teflon pan would be.  A quick wipe after use and you are good to go for your next meal.  And no chemical finish to flake off in your food.  Bonus!  

I can't begin to tell you how many electric kettles I have purchased only to have them burn them out within a couple of years.  When the last one - a cute, little cordless unit - gave up on me, I went looking for a large, stainless steel, seamless stove top kettle.  This was a tough order to fill.  I lucked out on a new one at the local hardware store.  It holds 6 litres and has no bottom seam, for the water to eventually break through and leak out.  I have had this kettle for over 4 years now.  That is already way longer than any other kettle I have ever owned!

Collection of Vintage Cast Iron Frying pans and my stove top kettle which have a
permanent home on the cast iron grates of my all gas range.
If you look at my stove, you will notice that it is gas, with cast iron grates.  I have always had an electric stove.  I have replaced more than my fair share of elements - both in the oven and the stove top - and electronic parts. 

My, "I thought it would be my last" stove purchased new ten years ago, was a beautiful Dual Fuel range.  It had a built in dehydrator, a bread proof setting, built in temperature probes, 2 electric ovens, 5 gas burners and more options than I could ever use or even knew existed!  It was My Absolute Dream Stove!  

And then the mother board went on it - not once, but twice.  

And the thermostat went on it - my oven would fluctuate 100's of degrees up or down within moments - so cookies were either molten lava within mere seconds or still raw after the required baking time had passed.  Grrr 

The auto start/stop timer quit working.  I couldn't trust it to turn on at the scheduled time or turn off as programmed.  Sigh. 

One of the electric ovens had quit altogether.  It was one thing after another.  When the main mother board went for the second time, I had had enough.  Not another dime was going into it.  Warranty had long since passed and it wasn't worth to keep fixing as previous fixes were being re-fixed. 

So, I went about looking for a plain old, old fashioned gas stove. No electronics.  No special features.  Something I could light with a match, should I chose to.  Unless I was able to find something pre 1980's, things weren't looking too good for me.  

I had the local appliance store do a search for me.  I wanted a bare bones gas stove.  Do they even make these any more?  I was so happy when they were able to locate one for me!  It would have to be shipped over from Germany, but I was willing to wait.  No bells.  No whistles.  No parts to malfunction.  No electronics to blow up. And it works like a charm! I have had it for well over three years now and not one service call.  Not one glitch - not even a minor one. Although this is not an "old" gas stove, it sure works like one.  And I am extremely happy with it.

If you ever come to my house, you will also notice that not only a good many of my kitchen utensils are old or vintage, but so is our furniture. 

As 1980's newly weds, we had done the whole modern furniture thing, but the stuff didn't last.  The finish peeled or wore away.  Frames broke.  Drawers broke.  I don't think my kids were that rough on stuff, it just wasn't very well made.  And it certainly wasn't made to last.  By the 1990's pretty much everything we owned needed to be replaced. 

Papa built me several wooden pieces, including our bedroom set, storage units and shelving.  I found myself getting more and more interested in old fashioned furniture and its construction.  Since then, pretty much every piece of furniture in our house is either antique, hand made or vintage.  Things were made to last and last they do.  They also stand the test of time.  I also don't get tired of vintage/antique furniture like I do with the more modern trends.  Classic is Classic.  I find something that works for me and I just stick with it.  If it isn't broken or worn out, I find no need to replace it.  And, If we can make something new out of an otherwise old item, we will absolutely try.  

Hubby re-purposed an antique bed to become a bench for my front porch. 

I guess I really do love old things.  Including Papa!

Have a wonderful day.

Until next time,

Gremlynn


Sunday, 3 May 2020

The Babies and The Boys of Summer are Here!


Greetings Earthlings!

It appears that winter has finally left the building.  It is just me, or did this year's winter seem extra long?  I don't think it was, truly, but it sure seemed to be.  For me, anyways.

Perhaps it had more to do with being shut in from the extreme cold and Papa's recovery, then being told we needed to be shut in due to the virus.  I am so grateful to be living a country life - we are free to go outside without worrying about running into anyone.  I am even more grateful to be able to go outside and not have my face frozen off now!  So thankful for small things to make me happy.

We have embraced April with full vigour.  From watching the snow melt away, to getting the greenhouse up and running, to getting the high tunnel erected, to baby chicks hatching in the incubator and finally the deliver of this year's Boys of Summer - Quar, Anne, Tine our three Hereford Steers.  Feed was delivered and more feed was picked up last week.  We began to clean out the flower beds and planted 2 more cherry trees in the back orchard and 4 new shrubs down by the pond.  We also moved 9 peonies from their temporary home in the nursery area of the main garden, to their new permanent bed by the upper pond.  We have had socially distanced coffee in our driveway and wine on the front deck, enjoying the warm sunshine.  We have toured friends through our yard, to see the new additions and have managed to maintain our distance from each other.  How I would love to hug my dear friends, but for now, we are happy with video and phone chats and visits in the driveway and a friend's wheat field, if need be.  Strange times indeed, but you do what you have to do.

The High Tunnel is up and ready to be filled. 


Papa planting his tomatoes in the high tunnel.
I really hope that it's not too soon!
I can't get over the difference in heat inside and outside the high tunnel!  I am suspecting he is going to need a heat sink out there if he plans to plant his tender tomatoes out there this early.  Time will tell!  Fingers crossed it goes well.  He checked the forecast before planting, happy about the warm, sunny days ahead.  And then, it changed of course, to cooler weather and frosty nights, after he was done.  Sigh. 

The Greenhouse is doing wonderfully!  His circulating solar heated water system is working beautifully again this year.  I am also so happy we picked up that propane furnace for those extra cold nights.  Things are thriving!

Petunias already in bloom!

And check out the Long English Cucumber!
It will soon be "Have you eaten your cucumber yet today?"
time again!  Hee hee!
The baby chicks came a day early.  Perhaps we didn't count correctly!  Regardless, we got a 78% successful hatch rate.  That's pretty good indeed!  I felt bad for the 9 eggs that didn't hatch out.  One had a pip hole in it and the other 8 had nothing.  You never really know why an egg doesn't hatch. We left them in the incubator for an extra day and a half, just to be sure, but there was no movement or chirping coming from any of them.  The other 31 chicks are doing very well - being their chicky cuteness! 

Whew!  Breaking out of an egg is very hard work!
Time for a much needed rest! 

The chicks hatch out very tired and wrung out.  It doesn't take them long to dry off and hop about
and cheep for joy, encouraging their hatch mates to join the party!

31 little Chicken Nuggets are in their brooding area.
They will stay in there for 3 weeks or so, until they no longer need the brooding lamp
and have most of their Big Bird feathers.  They are so cute when they are this little.
We love the Hereford breed of steers since they are generally very friendly and docile.  They are so personable and tend to settle in right away.  We have had several other breeds over the years, but none are as nice to have around as the Herefords are.  This year's group is no exception  The look so little!

2020's Boys of Summer:  Quar, Anne, Tine!
We are so happy to see our goldfish swimming about, now that the pond is completely thawed out.  I can't remember if they are 2 or three years old now.  We had our first school of gold fish for many years, until we lost them all one really bad winter.  Our daughter showed up with a bag of feeder fish to replace them all - at least 2 summers ago.  We are so happy that they survived another winter.  They are getting so Big!  We have experienced babies in the past, from the first bunch.  Perhaps these ones will reward us as well one day. 

4 of the 6 observed Gold Fish in the Pond!
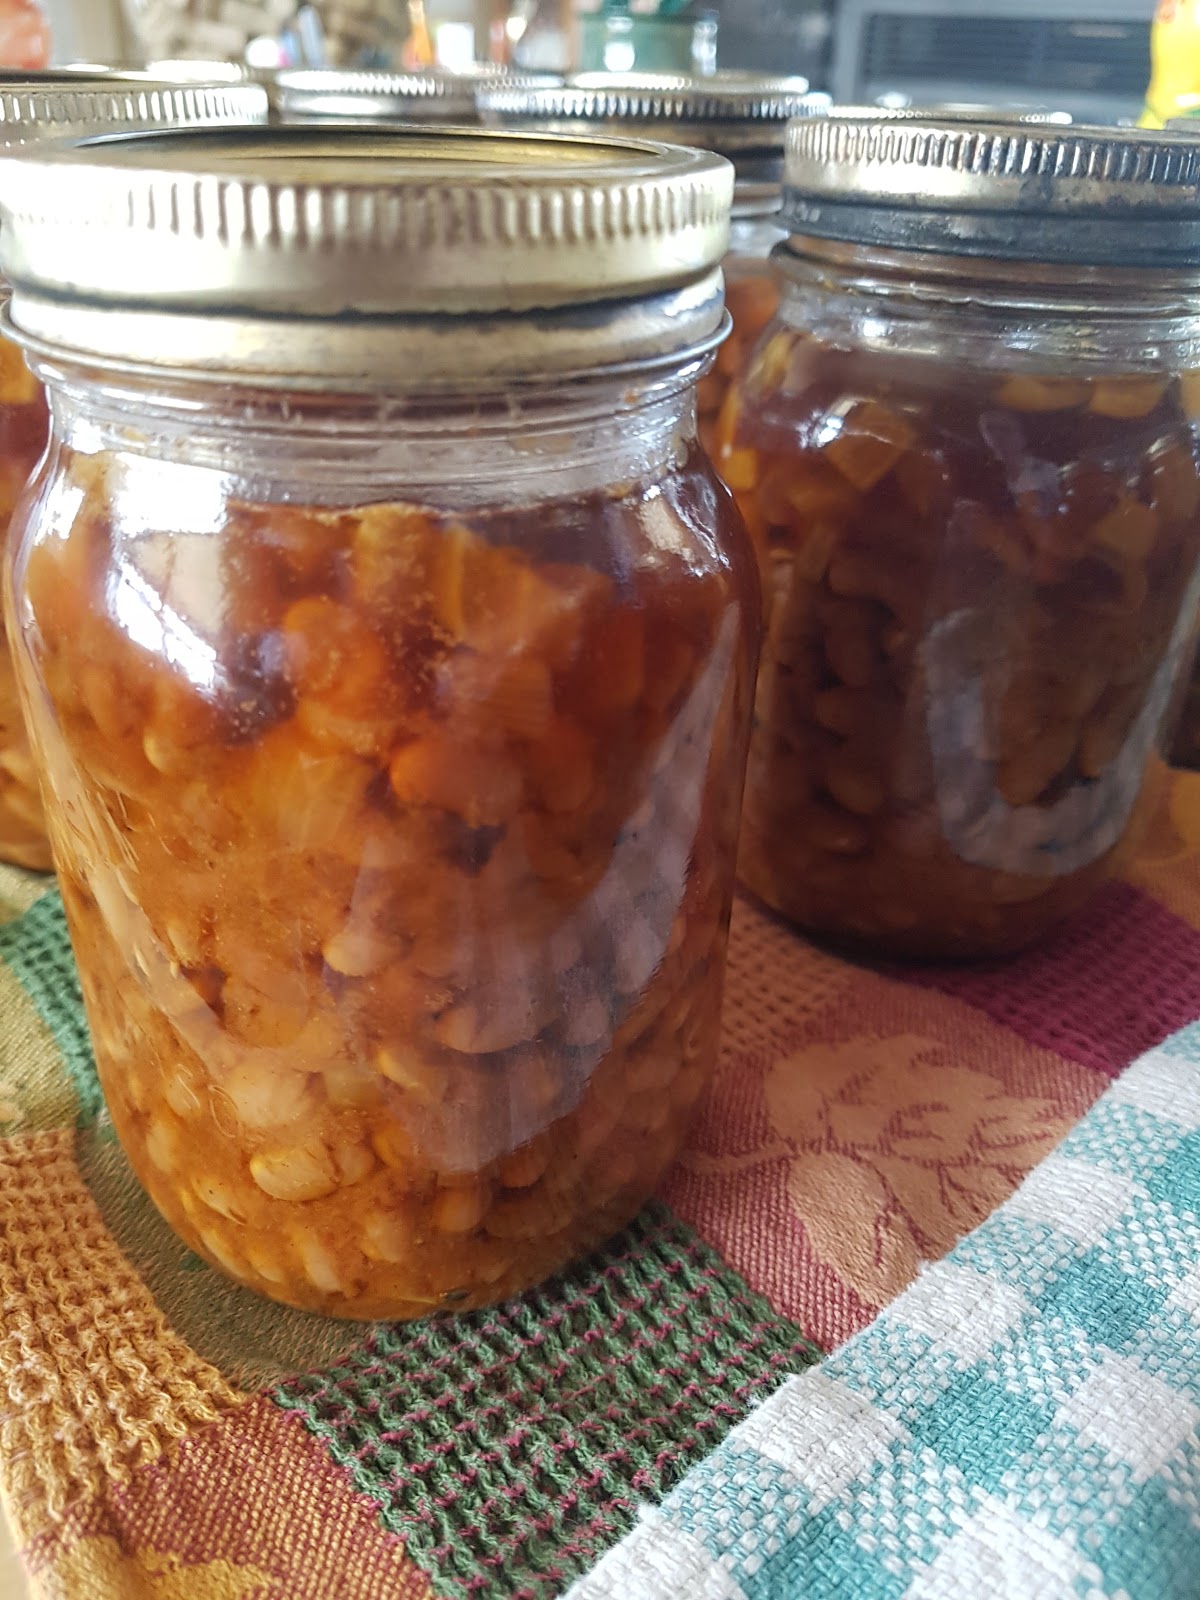
I had to do some canned beans recently as well.  I was going to make a pot of chili and was surprised to find that we had consumed most of the pressure canned beans in the cold cellar pantry.  I guess they must have been good!  I tried a new basic baked bean recipe for this one.  There is more pepper that we would like in the sauce and the flavor needs tweaking - they are a bit flat - but I think I can work with this recipe.  It is very close to what I was wanting to produce.  The beans I normally make for just eating are a Maple Syrup and Apple Baked Bean - so awesome!  The other beans I pressure can are Romano, Black Eyed, Red Kidney and Garbanzo.  All of those are just in water, ready to be added to a recipe and season as desired.  I was wanting a tomato/molasses bean to add to chili dishes.  These are pretty close to what I am looking for, but I have made notes to make changes the next time I do them.  Here is the link, if you want to try the recipe for yourself:  https://youtu.be/rEtSjzVN7XI

Tomato/Molasses Basic "Baked" Bean just
out of the pressure canner.


It was also the first time I got to use my new Presser Canner Weighted Rocker Regulator.  Up until now, I had relied entirely on the pressure gauge and the basic pressure regulator.  I had read recently that if you replace the basic pressure regulator with a weighted rocker regulator, your pressure will stay more precise during your caning session.  I figured that I had nothing to lose, so I ordered a "replacement" weighted regulator.  Well.  Game Changer!  Instead of having to sit and "baby sit" my gauge so it didn't drop below the recommended pressure for my altitude or go way above, once the new weight got to proper pressure, it does a gentle Hula dance.  I adjusted my heat flame maybe twice during the whole 90 minutes of canning time, instead of every 10 minutes or so as it crept and fell.  No siphoning and no yuck on the seals.  In fact, I had a 100% seal success rate.  I am glad I stumbled upon this pearl of information.  It was also very freeing to not have to sit and watch the gauge.  I managed to get a lot of sourdough bread made in this same time.  If I have to be in the kitchen, I prefer to get a lot done in a short amount of time. It has bothered me to have to watch the gauge so closely.  Now I can just listen to it rock and know that the pressure is fine.  And, if I did happen to check the gauge, it stayed steady at the psi it needed to be at.  Seriously, a Game Changer for me!

I haven't been spending much time in the studio since our focus has quickly shifted from indoor pursuits to outdoor activities.  I did, however, transform another unwearable pair of jeans into a fun and funky large summer tote.  The wooden bars that the straps are woven through are available for purchase in the studio.  We offer them in two different sizes to make an easy to open, but tightly closed bag when correctly installed.  You can take any purse or tote pattern and instead of adding a zipper or another closure, you make two sleeves to hold the purse bars.  The bars are slid into the sleeves and your continuous strap is added as a final step.  The beauty of the bars is the weight of the bag forces the bars together to keep the top closed.  But when you need to open it, you put it down and it slides open, without effort.  I am really happy with my funky tote.  I can wear it cross body or just carry it as a bag.  I had a lot of fun making and embellishing it.  It was a design as I went project as I had no pattern to work from. 

The top part of a pair of jeans with a new, stabilized bottom added
and embellished with fun buttons. 

The inside of the tote includes a large, zippered pocket
(look at the black strip towards the bottom of the picture)
and a large, three sectioned open pocket on the other side. 
Notice how easy the strap slides in the purse bars.  
And this about sums up how our last 10 or so days has been.  We are keeping ourselves occupied as we patiently (or rather impatiently) wait for this Covid crisis to pass.  It will be wonderful to be able to hug my loved ones again.  It will certainly be quite emotional.  I can't say that I will be letting them go once I start.  

Stay Safe Everyone!

Until next time.

Hugs,

Gremlynn


Tuesday, 21 April 2020

Musings on a Trampoline Up-cycle, a Skirt Conversion and Pasta Sauce

Greetings Fellow Earthlings:

Garden News: 

Last summer was very cold.  So cold and wet that we got zero pumpkins, zero spaghetti squash, maybe 2 or three small zucchinis, perhaps one cantaloupe, no honeydew or water melons.  The tomatoes in the garden were dismal, at best.  As were the bell peppers and pickling cucumbers.  We were thankful to have had our little greenhouse so we could at least harvest the heat loving veggies from there.  And we were very grateful to have had that for my canning and preserving.

We had been discussing (mostly wishing about) covering our main garden for years.  Making it into a huge high tunnel over the whole garden.  But this would have created other issues and the expense was too much to even consider!  So, we just carried on with what we had.  Until, that is, our 10 year old trampoline got a tear in the tarp early last spring.

Unable to repair the tear, I set about to try to find a replacement tarp. 

First of all, did you know that the number of springs is different from one brand to the next, even if the diameter is the same size?  Who knew? 

Then, when I do find a replacement with the same number of springs, the price was over 5 times what we originally had originally paid for the whole trampoline in the first place!  Well.  I love my grand buddies, but that's not happening! 

So, the trampoline was taken apart and we contemplated what to do with it.  The tarp could easily be re-purposed as a shade cloth for the chicken run after I whip stitched the tear.  But what to do with the frame?  What to do?

As we contemplated the miserable and mostly non-existent harvest of the out door, heat loving plants that same summer, we revisited the thoughts of a high tunnel.  And how nice it would be to be able to protect those tender, heat loving plants . . . 

Then suddenly, inspiration hits!  We have a perfectly good 14' trampoline frame.  If split into two halves, the two pieces suddenly become 2, 7' high by 14' wide half circles/arcs.  What if we could use those to make a high tunnel, just for the tender plants? 

What if other people had old trampoline frames hanging around their properties and just wanted them disposed of since they couldn't justify the cost of replacing their tarps as well?

So, I placed an ad on a Buy and Sell site:  "Wanted: Old 14' Trampolines, Will Pick Up".  Within 3 days, we were offered over 5 frames.  I had to pull the ad.  Apparently this is a common issue!  Most of these old trampolines were already frozen in for the winter, so I collected the names and phone numbers to arrange for spring pick ups.

Papa began to put his thoughts onto paper and played with our own trampoline frame in his workshop.  In theory, this would work!  Now, all we needed was the lumber for the end walls/door, the plastic and a place to put it.

The lumber and plastic were the easy part.  He ordered the necessary wood and after deciding how long he wanted this high tunnel to be, he contacted Bob at www.northerngreenhouse.com, and placed his plastic order. 

Now that the snow has finally decided to leave us, we are beginning to collect the old trampolines.  I am so excited at the prospect of having a covered area for the tender, heat loving plants and more room for the root crops in the main garden.

As this needs to run East to West to maximize the South facing sun, we ended up having to put it into the lower pasture.  We needed easy access to water and the house, so Papa decided to move a bit of fence to make this happen.  It's not the first time he had to move rail fencing for a project, hopefully, it will the last.  But somehow, I doubt that too!

Site of the New High Tunnel.
He has the grass removed and is beginning to build the support
walls for the soon to arrive trampoline frames.


Yesterday, while doing a property tour with my trusty companion, I stopped in the greenhouse to check out the progress in there.  Imagine my delight to see tomatoes in flower and mini, baby cucumbers already forming!  Fresh veggies will soon be on our plates again.  Yay!

Tomato blossom!

Itty bitty baby cucumber! Grow, baby grow!

Spinach and Romaine Lettuce growing in a tub!
Can't wait for fresh greens again.  It has been too long!
Also on our walk, we noticed the Pond is starting to thaw out.  No sign of any fish yet as there is still feet of ice to go, but it is melting away around the edges.  One of the cats was down for an ice cold drink!  And I did notice one of our pond plants in the newly iced cleared water, is starting to turn green, so that is a good thing.  You won't ever know what has survived the winter, until the 18" of ice finally melts away! 

Studio News:

I am still actively attempting to make a dent in my scraps collection.  I swear that it multiplies daily! 

My current scrap buster attempt has been sewing strips onto old phone book pages.  These strips are random widths, anywhere from 1" to 2.5" wide, including leftover binding strips. 

I start with a phone book page, cut in half, so My paper happens to be about 5.5" x 8.5".  The actual size really doesn't matter as the point is to use up the fabric strips and make uniform blocks for another project. 

I then lay on two strips, right sides together across the middle of the page.  Make sure your strips are longer than the paper is wide.  You want to be able to cut away some excess fabric when you are done, to make nicely squared up blocks, all the same size.
 
My sewing machine is threaded with 50 weight cotton thread.  The color doesn't matter.  This is a great project for using up partial spools and those partly filled bobbins. 

I have a size 14 sharp needle and my stitch length is set to 1.8.  I have a 1/4" piecing foot on, but your width really doesn't matter much either, since you keep adding strips until your paper is covered.  Some blocks will only have 4 or five strips.  Others may have 8 or more.  Variety is key.  And you want to clean up those strips!

Once the first two pieces are sewn on, I press them open, then keep adding strips and pressing until the paper is completely covered. 

I then turn the blocks over and trim away the excess fabric and remove the paper.  Because it is very thin paper, it pulls away cleanly and neatly.  I did this once with computer paper, with unhappy results - the paper is too heavy to be removed easily. 

These striped blocks will be the beginning of another scrappy themed quilt. 

Did I make a dent in the scraps?  It would appear not.  But it was fun and mindless sewing.  So it's all good!

One pile of scrap strips in random widths and
a pile of Phone book pages, that were cut in half.

Right sides together, sew the strips onto the paper.

Press open.

Keep adding strips . . .

 . . . until the paper is completely covered.

Fabric side down, paper side up, trim away the excess fabric to the same
size as your foundation paper, then remove the paper.

Another finished striped block done!

Another project I recently completed was the transformation of an old, ill fitting pair of jeans into a cute denim skirt.  

I had purchased these jeans several years ago.  I really loved the embellishment detail on the front pockets.  When I tried them on, I thought they fit really well.  That is, they seemed to fit really well. 

It wasn't until later that I discovered I couldn't sit down in them. Every time I sat in these jeans and stood up again, I had to pull them back up.  Every time.  When your job has you going from standing to sitting to standing to sitting, many, many times a day, the constant pulling up of the jeans got really old, really fast.  So, they hung neglected and unworn in my closet for several years.

I was cruising thru Pintrest one day and ended up seeing a denim skirt that had been converted from a pair of jeans.  This piqued my interest right away.  I figured that I had nothing to lose, so I did a quick search on YouTube on how to transform jeans into a skirt.  Voila!  A couple of hours later I am now the proud owner of a sweet little skirt!  Yay!  I would absolutely do this again should I ever need to!

Cute, ill fitting jeans with the inner leg seam opened.

Front of Newly crafted skirt.  So happy with the result.

Back of the altered jeans/skirt. 
Yes, that is a dip on the bottom hem.
I had lots to work with, so why not!


In the Kitchen:

This is a super quick to make pasta sauce that will feed a crew or keep two old people stocked up with left-overs for several days.

Gremlynn's Spaghetti Sauce:

Add the following items in layers, into a 6 quart crock pot and set to low:

1 pound of ground beef, broken up in the bottom of the crock, sprinkled with 1 tsp each of salt and pepper and 2 tsp of worchestershire sauce (omit this step if vegetarian)

1 medium onion, diced
2 cloves of garlic, crushed
1 carrot, peeled and diced
1/2 green pepper, seeded and diced
6 or 8 mushrooms, chopped
1 tsp sugar (cuts the acidity of tomato sauce - surprisingly, you will notice it, if you omit it!)
1 handful of dried parsley (about 2 tbsp)
1 handful of dried oregano (about 2 tbsp)
1 tbsp of crushed basil 

Mix the following tomato based ingredients together in a separate bowl and pour over top the layers already in the crock pot:

1 small can of tomato paste
1 litre of stewed tomatoes (or close to if using canned)
1 pint of tomato sauce (or close to, if using canned)
1 can of tomato soup (right out the can, undiluted)

Let simmer away for about 6 hours on low, as it is. 

After about 6 hours, stir and combine everything in the crock pot.  The hamburger (if using) will be a cooked layer on the bottom.  I use a "S" style potato masher to break it all up into smaller chunks.  If you don't care for the texture, just precook it the next time you make this recipe.  It won't make the same solid base that uncooked ground beef makes. 

Cover and leave on low until you are ready to cook your pasta for dinner.

This reheats beautifully!  I usually make spaghetti for 2 nights using this sauce.  On the third night, I'll do up some ravioli, or bow ties, or penne noodles and make a casserole by combining the noodles, the reheated leftover sauce and do a pasta bake.  Sometimes I add spinach for a change.  This is then topped with cheese and baked for 45 minutes at 350 f until casserole is bubbly and cheese melted and brown. 

Or you can freeze the left over sauce in smaller portions, for a quick supper another day.

I also use this sauce as the base for my lasagne, which I will often make after night two, instead of the pasta bake.  I freeze the lasagne unbaked, for another future meal.  

A great and versatile sauce with minimal effort.  My kind of cooking!

Until next time, keep staying safe.

Regards,

Gremlynn


Monday, 13 April 2020

The Old Normal and the New Normal

Greetings Earthlings:

How are you all managing with the self isolation as per the Covid-19 recommendations and guidelines?

I was out in the studio the other day stitching some scraps into strings, onto old phone book pages, while listening to one of my favorite YouTube channels.  

Yet another basket of Scraps! 
I swear they multiply when I'm not paying attention!

Random width strips, sewn onto old phone book pages - for easy paper
removal when done, will net me new scrap blocks for a
future project.  A great simple project while I listen to the radio or
a You Tube Channel.


The presenter was sharing that she had always dreamed of being snowed in and stuck at home for weeks at a time.  In fact, in many of her videos, she would often comment how much this was her one big wish.  A Dream, actually!  And here she is.  Stuck at home.  For weeks at a time.  Unable to go anywhere.  

Then she realized that maybe she really didn't want this dream after all.  She was having difficulty getting about her day.  Difficulty finding any motivation.  It is very different, when you know the situation is temporary and there will be an end in sight. 

She had always been a very patterned person with a strict schedule.  A busy mom, grandmother, full time management level employee, homesteader, a canner, a YouTube content maker.  And yet, here she was, suddenly "living the dream" as it were, yet getting nothing accomplished!

After speaking with a friend, it was decided that perhaps she was experiencing a mild form of depression.  This was nothing she hadn't ever experienced before.  She is not prone to depression.  Never had been.  Her sudden lack of motivation was troubling her as she is usually a whirl wind.  A 100 mph girl, in her normal day to day life.  But suddenly, like everyone else, her everyday normal life as she knew it, was over.  Without warning.

Armed with this new insight, she has firmly decided to take this opportunity to get up and use her time to get at all those "extra back burner" projects accomplished.  The ones that were on the someday list.  She didn't want to look back at this time and regret not putting it to good use.  She has always been a list maker, but has decided to add a deadline to each of the items on the list.  Clean out the shed:  Monday.  Paint the cabinet:  Tuesday afternoon.  Organize and inventory the pantry:  Wednesday morning, and so on.  She is still working from home as her job is an essential service and she does have to go into her office twice a week, but she is becoming much more focused on the tasks at hand.  

This pandemic, obviously, is nothing like a good, old fashioned snowed in for a week blizzard, by any stretch of the imagination.  But, there are some similarities for sure.  For those of you working the front lines, be it medical, essential services and essential retail, I salute you and thank you for your sacrifice.  For those of you able to work from home, it puts your occupation into a different light, for sure.  For the rest of us, business owners, retirees, self employed, those currently in limbo, are you using this time to explore your potential?  Or are you feeling unmotivated or afraid or worried about the future?  The new, new normal. 

I am feeling confident to share, that like every other pandemic, stock market crash, economic depression in the past, things Will eventually get back to "normal".  It's just this "new" normal may or may not have a resemblance to our previous "old" normal.

I am old enough to remember home doctor visits.  They were called house calls back in the day.  During this "old" normal time, I remember getting stitches on the kitchen table as a child and shots at home, as well. They didn't want really sick people sitting in the waiting room at the doctor's office, potentially spreading their germs to the others also waiting there.  I remember if you did have to go in and were really sick, you were immediately put into a separate room - for your own and everyone else's protection.  It has only been since the 1970's and 1980's that the doctor's office waiting rooms got more communal and much busier.  And now, if you can't get an appointment, you are encouraged to use a walk in clinic or visit the emergency room at the hospital.  How did it get to this point?  This "new" normal. 

In the "old" normal, I remember that when you were sick, you knew to stay home until you were well again.  You weren't shamed into going into work or told that if you didn't come in even with a 102 degree F fever and hoarse from coughing, that you would be fired.  Or told that you have taken too many "sick days" this year and couldn't have the time off.  Like now, in the "new" normal. 

We didn't see people with the flu wandering the grocery aisles and coughing up whatnot, picking up items with freshly coughed upon hands, then putting those items back as they were decided against.  Spreading their joy to everyone during their outing.  People just knew to stay home.  Someone would bring chicken soup.  Three to five days later, you felt well enough to go back to work or to school and the entire office or classroom wasn't fighting a recirculating virus/flu for months at a time, like they do in today's normal.  

It was 4 years ago this month that I picked up a virus at a quilt show.  I was tired and run down from just having closed my store, but otherwise healthy.  I was looking very much to going to a quilt show as a viewer and not a vendor or supplier.  It was at this show that someone sneezed on me.  A full on sneeze to my face.  I was shocked to say the least and immediately went to the ladies room to wash up.  Two days later I was feeling rotten.  Five days later I was so terribly sick that we cancelled our much anticipated trip out to the Island for a respite.  I was sick for a year.  An entire year.  To this day, I have not recovered to my former state of health.  Perhaps the sneezer didn't realize she was sick.  I would like to hope so.  That virus and my personal experience with it, has changed my life.  I had always avoided people and public places when I have a cold.  I would hate to make someone else unwell do to my inconsideration.  Unfortunately, not everyone feels the same way.  This too, is a "new" normal. 

We are gone from a society where we weren't expected to be super human, multi tasking, over achievers afraid to lose our jobs if we had to stay home for a few days, every now and then.  People got sick, but it is nothing like now.  The viruses and flues seem to hang around for months on end.


I remember the AIDS crisis of the 1980's very well.  No one knew where it came from.  No one knew how to treat it.  Public opinion and fear were rampant!  People were afraid to use public washrooms for fear of catching it from a toilet seat.  When it became understood, people were educated on how to keep themselves safe, and it has become pretty much non news worthy now.  This will too.  We will "remember when", but we will become better informed and better able to manage it.  In time.

Maybe our "new" normal might actually allow people to properly take care of themselves again for the betterment of all those around them?  

We have become a society so bent on not missing out and having to be busy all the time.  This is a phenomenon of our "new" normal.  Remember staying home?  Remember Saturday night board games?  Sunday drives?  Writing a letter?  Reading a book?  Having a cup of tea with a neighbor on your front step?  These were simple, innocent times for sure.  But they were also a time of Polio, Tuberculosis, Red Measles and Whooping Cough.  The "old" normal didn't have people as mobile as they are now.  You didn't hop a plane to Vegas for the weekend or drive 2 hours to meet friends for dinner.  We are a constantly moving population and have been very carefree with our ability to do so in our "new" normal.  

Every generation and era has experienced a major health, financial and/or social crisis.  We are not immune to this.  After this one, there will be another and then another.  It is how the world works.  This is not a new thing.  But, I do think one of the biggest differences we are experiencing now is science has a better understanding of how a pandemic moves.  This, and they are using our moment by moment attachment to the media, that we keep at our very fingertips, to communicate both informed and misguided information.  And this is also where it can get really tricky.  It is increasingly difficult to sort out the facts from the fiction, as the current information can change within moments.   

Like a "snowed in blizzard", society doesn't know how to handle the sudden change in our day to day lives.  Unlike a snowed in blizzard, this will be longer than the 2 weeks or a month before we can dig ourselves out of it.  

Since we have no control over the situation, we need be mindful and thankful that we have those doing and advising us, in the best way that they can for us all.  We need to listen to them as we navigate our "new" normal.  We also need to be thankful that we could actually still live in a time where we didn't know what was coming or going on, until it was far from too late.

This too, shall pass.  Use your time to the best of your ability.  So when you look back on this, in say 10 years, let be a time when you can say, "I did . . . then",  "I learned how to . . . then", "My loved ones survived the pandemic of '20 because we stayed home" and this is our "new" normal.

Until next time.  Stay home.  Stay safe.  Stay healthy.

Gremlynn


Saturday, 4 April 2020

Papa's Big Heart


Good Day All,

"I am still determined to be cheerful and to be happy in whatever situation I may find myself.  For I have also learnt from experience that the greater part of our happiness or misery depends upon our dispositions and not upon our circumstances."  Martha Washington

We're managing the whole Self Isolation thing quite well.  It really isn't a far departure from our normal day to day out here.  The only real difference now is, instead of deciding which of us two should go to town this week, we don't have to consider that for the foreseeable future.  It was usually a discussion that went something like this:  "You go."  "No, I went last week.  You go."  "We really should go, we need (insert item here)."  "If it's that important to you, then you go get it."  Yup.  We really are that exciting!

A few days ago, Papa told me that he wanted to make a wooden heart to hang on the fence as a Thank You to all those working on the front lines and to send a message of love for all to see.  I thought, what was a wonderful idea!  So, off he went to his workshop .  Imagine my complete and utter surprise when I he showed me his heart!  It is huge!  I was thinking maybe something like 2 feet by 2 feet.  Kind of like the fence critters he makes and hangs up on our property.  This heart was nothing like any of those!  He used 2 sheets of 1/2" plywood.  He cut out 2 half hearts, that he proceeded to paint red. 

Half of the heart to be mounted. This is 1 sheet of 4 x 8 feet of 1/2" plywood.
He made 2 of these to make a full heart.

And when he said "fence", I had assumed that he meant Our Rail Fence - again, I had a critter thing on the brain.  Nope.  He meant the posts he had put on the neighbor's property that borders Hiway 2.  The place where we had the sign up for the quilt shop many years ago. 

After getting permission from the neighbor to access the property, he now needed to scope out a plan on how to get it out there.  After all, it is still very much winter here in Central Alberta and the snow in the pasture is potentially still very deep. 

So with a sleigh loaded up with 2 x 6's to support his Huge Heart, a ladder, tools and the two, 4' x 8' half heart shapes, we headed out.  His plan was to pull the sleigh up the 45 degree berm, then go along the back of the property, through a gate and out to the posts at the end of the property, next to the hiway .  This sounds really simple, when you say it fast. 

Two half hearts, sitting on a ladder, on top of other assembly items
 required to make the big journey.


It took the two of us old people everything we had, to pull this sleigh up the 45 degree snow covered angle to get to the top of the property.  Okay, that was interesting, but we did it.  Now to traverse the back of the property - through 2 feet of snow that randomly punches through the hard crust, sending a bit of a jolt through the old body.  He took the high road.  I took a lower pathway, along the tree line, where the snow was considerably less punchy. 

Then came the gate.  It was completely snowed through and frozen into place.  With no hope of digging it out or opening it, we picked up the loaded sleigh, while standing on the hard packed snow - hoping it wouldn't break crust - and loaded it over the gate.  He then climbs over and motions to me to do the same.  This Rolly Poly being does Not climb over gates.  I am build for ground travel.  That's how I roll. Low and Slow.  On the ground.  Not Over Fences.  He pulls the sleigh out of the way and tells me that I can do it.  I guess, I've come this far.  Over I go.  That's a first for me.  And now through the pasture, breaking through the snow crust until we get to our final destination.  Putting up the heart was the easy part.  Lots of honks as we hung it up, to send his love out for all to see.  Geez, I love this guy.   

Papa pulling the loaded sleigh to its final destination

Installing Papa's Big Heart


Yours Truly photo for prosperity.  
I still can't believe how big this thing is!
Gotta Love him!
And so, Papa's Big Heart has been installed, for all the world to see.  Sending Much Love!

Later that day - we don't do anything exciting for three weeks, then we have several exciting adventures all on the same day!  Anyways, we had ordered a pig for our freezer, sometime last fall.  As it happens, it was processed and ready for pick up on this same day.  

We also decided that since we were going out anyway, we may as well make an outing of it and head over to the Pik-n-Pak, a Fresh Veggie Store, at Gull Lake.  And since we were going that far, we may as well continue the extra distance and drop off some fresh veggies to our kids and save them a trip out.  We also packed along a few extras from our freezer and pantry to round out the deliveries.  

Sign at the Pik-N-Pak at Gull Lake 
Since this is only about 20 minutes from our home, this is about as local grown as we could ever get, when our own greenhouse isn't in operation in the winter.

I had made the grand buddies each an Easter gift that we decided to deliver as well, since we won't be getting together any time soon.  And we missed giving our daughter her birthday present, also due to the pandemic.  So loaded we were and off to make some front step deliveries.  How Exciting!  It was such a clear, sunny day.  The outing did us both a world of good.  


A Hand Knit Cable Pillow for each of our Grand Buddies as an Easter Gift.
We also included chocolate Eggs in each gift bag, of course!


After the front step deliveries of the care packages, we came home to two huge roasters of pork fat.  This we were needing to render down to lard.  It was mid afternoon and probably could have waited until the next day, but Papa wanted to get it done.  And so, we did.  

One counter top roaster of pig fat, ready to be rendered

And another Large roaster full destined for the oven

We set the temperatures to 250 degrees F to get the fat heated up and melting.  The trick to this process is to Not Cook it.  You want to Melt it.  No browning of the fat or your finished product will have a taste to it.  The goal is to melt, strain and let harden.

Melted, liquid fat poured through a double layer of cheese cloth,
inside a double meshed, metal strainer

Any impurities and chunks are captured in the cheese cloth. 
When the cheese cloth gets full, I dump the catchings into a large freezer bag.
This is saved for the chickens and wild birds.
They go absolutely Crazy for this!  Pure and Simple.

We ended up with two large roasters of rendered lard. 
The first pan is the first one poured and it already setting up.
The further back, black roaster, is the second pan full.
At the end of the evening - probably 6 hours +/- from when we started the process - we ended up with two roasters full of pure lard.  No hydrogenation.  No preservatives.  Nothing but Pure Lard.  From here, we let them cool and set up on the counter over night.  The next morning, they were popped into the freezer for an hour, so they would shrink and pop right out of their pans.  This would be cut up into usable portions and packed away in parchment lined boxes, for easy use when needed.  

Chilled Lard dumped out, ready to be cut into 250 gm portions (1 cup)

And packed into a used meat box, to be stored into the freezer.
And what does one do with Pure Lard?  Lots!  You can use it for cooking, baking, sauteing, really any place you would use butter or another solid fat.  It makes for incredibly flaky pie crusts.  A great fat for popping popcorn and cooking fried potatoes in.  You can also use it in soap making and the list goes on.  And what was Papa's first request after cutting up and boxing all this lard?  Can you bake a pie, please?  What a guy!

And now, into the Studio!  With all of this uninterrupted time we have had recently, I have been getting an amazing amount of quilting done!  After I finished the blue quilt last week, I have since quilted another top that had been sitting in my "to be quilted one day" pile.  

This one is a Double Diamond Rail Fence made from a line of fabric by Moda, called Lilies of the Field, designed by Jan Patek.  I brought this line into the shop several years ago, specifically to make a Lily themed quilt for Papa.  He grows 100's if not 1000's of lilies on our property at No Regrets Ranch.  How could I not make a lily themed quilt?  I have called it Papa's Lilies and it is big enough to be our summer quilt for our queen sized bed.  The top and backing are 100% cotton and the batting is 100% wool.  He was very pleased with the end result.  I am too.   

Papa's Lilies is Queen Sized and destined to be our Summer quilt
And from the left over rail fence blocks, I found some brick red in my scrap bin.  Along with the left over cut offs from the big quilt, I managed to get another 40' x 50" lap quilt for my charity box.  This gets me up to 5 now, I think? 

Another Pieceful Charity Quilt to add to my collection
And with that, this brings me to the end of this week's blog entry.

"Most folks are as happy as they make up their minds to be."  Abraham Lincoln

Until next time. 

Keep Staying Safe,

Gremlynn